Basics of model editing
Overview
Next Design allows you to edit the model while switching the representation format (view) of the model.
Model editing is mainly done in the main editor in the center of the screen and the sub-editor that can be displayed side by side. You can edit different models side-by-side or the same model in different views using the main and sub-editors.
In addition, in the model navigator, you can add models and change the structure of the model while looking at the structure of the model in a tree format.
The following describes the basic operations of model editing in Next Design in the following order.
- Edit in the main editor
- Edit sub-editors side by side
- Edit in the model navigator
Edit in the main editor
Select a model
To select the model you want to edit in the main editor, do the following:
Operation procedure
- Expand the tree in the Model Navigator to find the model you want to edit.
- Click a model in the Model Navigator to display it in the main editor for editing.
note
- If the main editor is not displayed, click [Home]> [View]> [Editor] on the ribbon to switch screens.
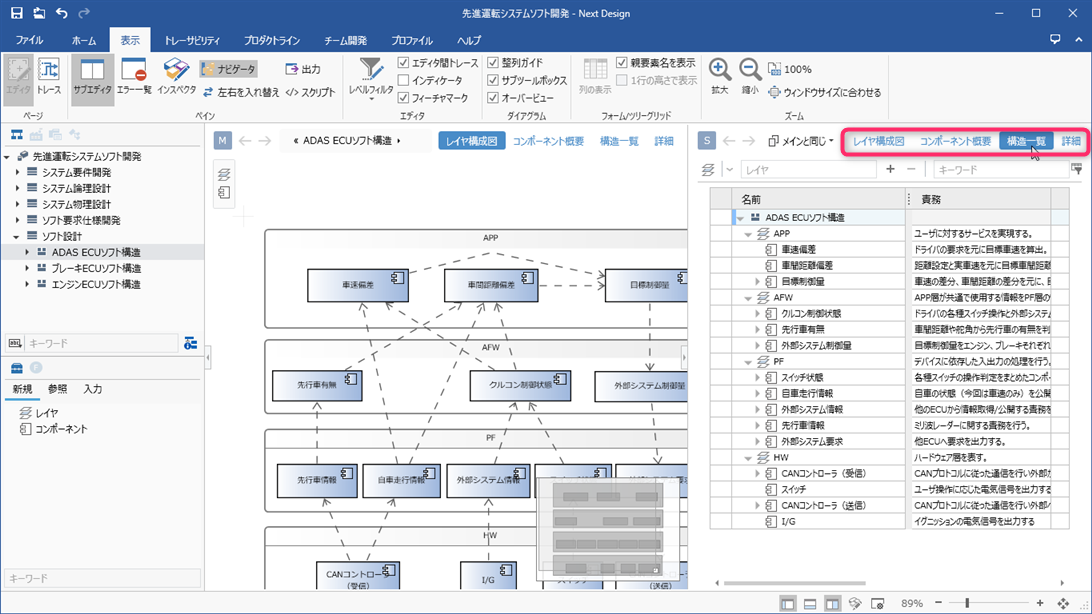
Switch views
To switch between views of your model, do the following:
Operation procedure
- When the model to be edited is displayed in the editor, a button for switching the model expression format (view) is displayed in the upper right of the editing area.
- Click those buttons to switch views.
(In the above example, select from three views: use case diagram/list/details) - If you edit the model in one view, it will be automatically reflected in the other views.
info
- The views available for model editing vary by model type (entity).
- The available views can be customized in the profile.
Add a model from a toolbox
To add a model in a diagrammatic view, do the following:
Operation procedure
- The toolbox below the Model Navigator shows the types of models you can add.
- Select the type of model you want to add and drag and drop it from the toolbox onto the view to add the model to the diagram.
- Details are given for each view type.
Other operating procedures
- You can also add a model from the sub toolbox that appears to the left of the editor's edit area.
- You can also add a model from the context menu in the model navigator.
Delete the model
To delete a model in the editor, do the following:
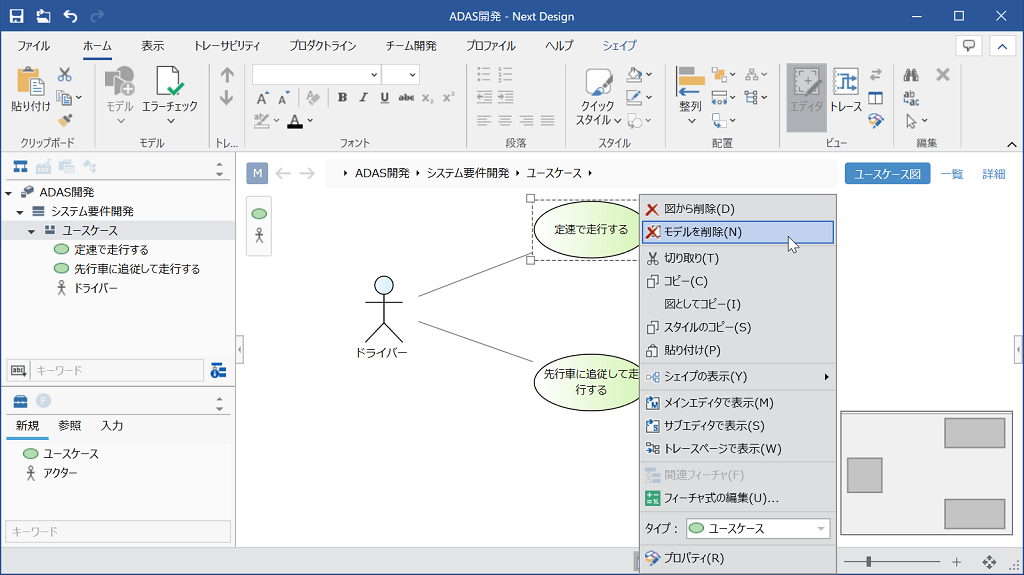
Operation procedure
- Select the model you want to delete in the editor.
- Do one of the following:
- Click the Delete Model command in the context menu.
- Press the delete key.
- The model is removed from the editor.
Edit sub-editors side by side
Show sub-editor
To display the sub-editor, do the following:
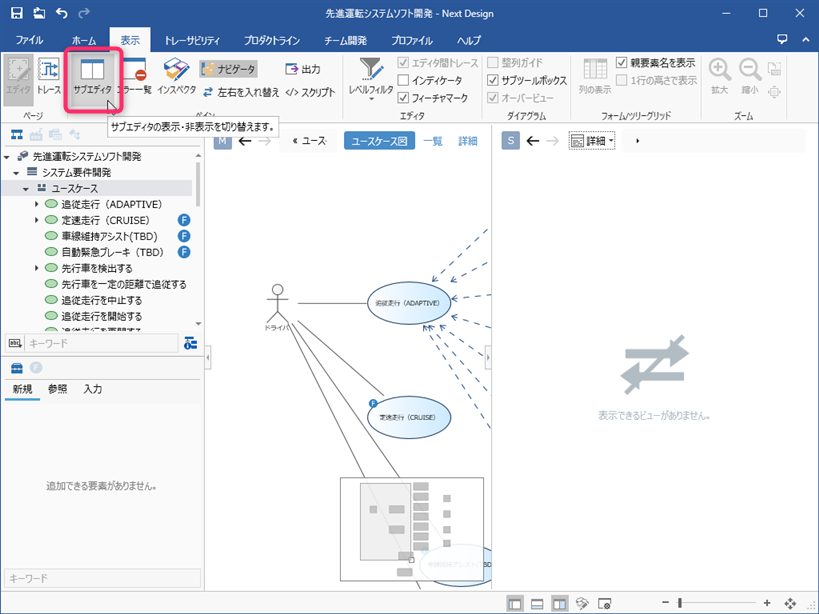
Operation procedure
- From the ribbon, click View> Pane> Sub Editor.
- Each time you click, it will be displayed/hidden.
Switch the model to edit
To switch the model to be displayed/edited in the sub editor, follow the procedure below.
Operation procedure
- Select one of the following tables from the [Switch Display Mode] pull-down list at the top of the sub-editor.
- If [Manual] is selected as the display mode, or if there are multiple models that correspond to [Input] and [Output], select the model to be displayed from the pull-down list that is additionally displayed to the right of [Switch display mode]. Select.
| Display Mode | Model to be displayed |
|---|---|
| Manual | Any model specified in the sub-editor |
| Detail | Model selected on the main editor |
| Input | Model for inputting trace information |
| Output | Model that outputs trace information |
| Same as main | Model edited in main editor |
See
- For the characteristic usage of the sub editor, Modeling Guide> Cross-process modeling> Design method in Next Design Please refer to.
Switch views
To switch between views in the sub-editor, click the view choices that appear in the upper right corner of the editing area, just as you would in the main editor.
Edit with Model Navigator
Add a model
To add a model in the Model Navigator, do the following:
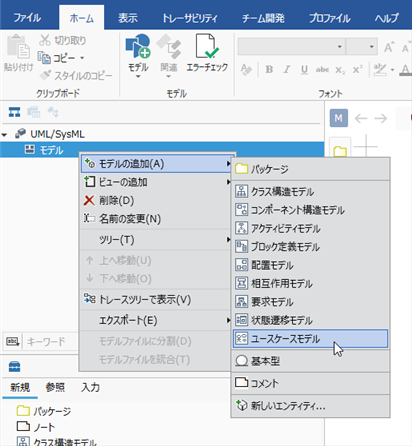
Operation procedure
- Right-click on the model in the Model Navigator to open the context menu.
- The types of models (entities) that can be added are displayed under the [Add Model] command in the context menu.
- Click the model type you want to add from among them to add the model to the children of the target model.
info
- The entities that can be added depend on the parent entity of the hierarchy and are defined in the profile.
Duplicate the model
To duplicate an existing model and its descendants to add a model with the same structure, follow these steps:
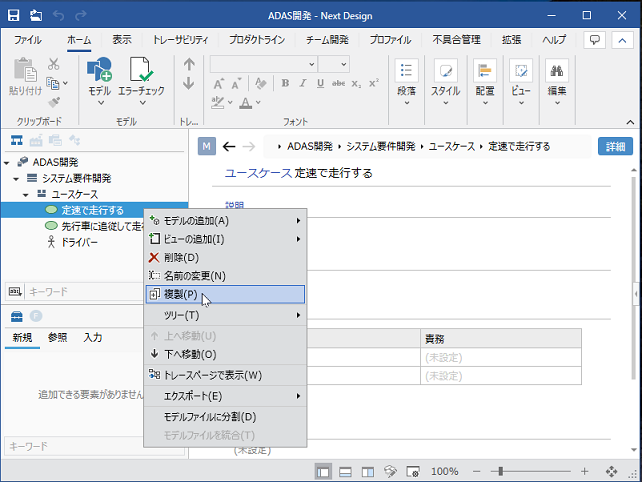
Operation procedure
- Select the model to duplicate in the model navigator.
- Click the Duplicate command in the context menu.
- The duplicated model is added immediately after the selected model.
info
The following content is duplicated based on the target model.
- Field input value1
- Models of descendants owned by the target model
- The association to which the target model is the association source
- If the association destination is included in the target model, the association destination is the duplicated model
- If the association destination is not included in the target model, the association destination is the same as the association destination of the duplication source model
- Ordering of models in the ownership / reference field of the target model2
- Editing information in each view (shape position in ER diagram, etc.)
The following content is not duplicated.
- Feature assignments and feature conditional expressions
- Relationship to which the target model is related
Attention
- If the model cannot be added due to the multiplicity constraint, the message "Cannot duplicate because the multiplicity constraint is exceeded" is displayed and the model cannot be duplicated.
Move the model
To change the order of the models or change the hierarchical structure in the Model Navigator, follow these steps:
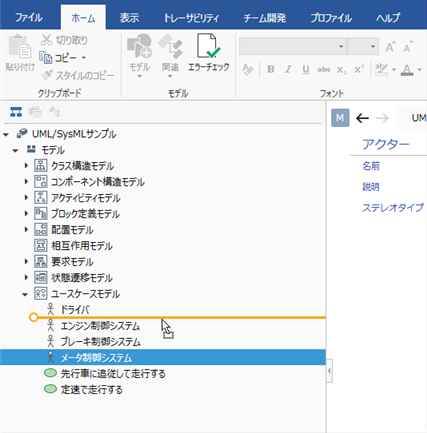
Operation procedure
- To change the order of the models, drag and drop the target model on the tree.
- To move the model to another parent and change the hierarchy, drag and drop the target model onto another parent on the tree.
Attention
- Models in the same hierarchy are sorted by entity and displayed, so you cannot move between different entities. The order of the entities can be customized in the profile.
- For moves that change the hierarchy (move to another parent), you can only move if the entity you are trying to move can be added to the destination parent entity.
- For fields with initial value, if the value of the internal field is null, the initial value will be set on duplication.
Internal field value that is null will only be set when the model is created with no initial value or via the extension's API.↩ - "Relationship to which the target model is related" is not duplicated, so empty indexes are filled forward.↩