Form view definition
Overview
Next Design allows you to define a view for viewing and editing model details like a traditional design document by placing the model's fields on the form.
You can place all the fields you want to view and edit in one form, or you can define multiple forms to place only the fields you need.
In addition to the fields that hold values, you can also place fields that hold related models (hereinafter referred to as related fields) on the form. Related fields placed on the form can be viewed and edited in list format with serial numbers or grid format.
When you place many fields on one form, you can group multiple fields to form a semantic cohesiveness or to fold each group.
The following describes how to define a form-style view in the following order:
- Place an existing field
- Place related models in list format
- Arrange related models in grid format
- Change the display format of related models
- Change the order of the fields
- Hide the placed field
- Group fields
Place an existing field
Place an existing field
Operation procedure
- Click to select a field that has already been placed on the form to specify where to place the field.
- Open the New Control dialog by doing one of the following:
- From the ribbon, click Form> Form> Add Exist Fields.
- Click Add Exiting Field from the context menu.
- In the New Control dialog, select the field you want to place from the Filelds choices.
- Next, select the UI format for editing from the [Form Element] choices.
- Click the OK button in the dialog to place the selected field on the form and display the field name as the title.
If you don't have any fields on your form, follow these steps:
Other operating procedures
- Click the model name at the top of the form to select it.
- Click Profile> Form> Add Exist Fields on the ribbon to open the New Control dialog.
- Select and place the fields as you did in the previous steps.
Change the display format of the placed field

Operation procedure
- To change the display orientation of the title, do one of the following:
- From the ribbon, click Form> Title> Title Display Direction and select Left.
- In the Inspector, on the Form Element tab, select Title> Title Display Direction> Left.
To change the fields placed on the form to a tabular format with two columns of title and value, follow the steps below.
Operation procedure
- Change the title display direction to the left as in the previous procedure.
- On the Form Element tab of the Inspector, check the Title> Title Display Direction> Surround an element with a line. Check box.
Arrange related models in list format
Place related models in list format

Operation procedure
- Click to select a field that has already been placed on the form to specify the placement position of the related model, similar to Place Existing Field.
- Open the New Control dialog by doing one of the following:
- From the ribbon, click Form> Form> Add Exist Fields.
- Click Add Exiting Field from the context menu.
- In the New Control dialog, select the field holding the relevant model from the Filelds choices.
- Next, select [List] from the [Form Element] choices.
- When you press the [OK] button in the dialog, the name of the selected field will be displayed as the title, and the related models will be placed with serial numbers under it.
Place existing fields in related model
Operation procedure
- Click the field of the related model for which you want to place the field, or the field of the displayed related model, and specify the placement position.
- Open the New Control dialog by doing one of the following:
- From the ribbon, click Form> Form> Add Exist Fields.
- Click Add Exiting Field from the context menu.
- From now on, the existing fields of the related model will be placed on the form by the same procedure as "Place existing fields".
Arrange related models hierarchically
Operation procedure
- To specify the placement position, click on the related model placed on the form or its field to select it.
- Open the New Control dialog by doing one of the following:
- From the ribbon, click Form> Form> Add Exist Fields.
- Click Add Exiting Field from the context menu.
- From now on, the models related to the related model already placed on the form will be placed under the related model with serial numbers by the same operation procedure as "Place the related model on the form".
Arrange related models in grid format
Arrange related models in grid format
Operation procedure
- Click and select the field already placed on the form to specify the placement position of the related model, similar to "Place related models in list format".
- Open the New Control dialog by doing one of the following:
- From the ribbon, click Form> Form> Add Exist Fields.
- Click Add Exiting Field from the context menu.
- In the New Control dialog, select the field holding the relevant model from the Filelds choices.
- Next, select [Grid] from the [Form Element] choices.
- When you press the [OK] button in the dialog, the name of the selected field will be displayed as the title, and the related models will be placed in a grid format under it.
Change the display columns of the grid
Operation procedure
- Open the Add New Column dialog by doing one of the following:
- Select any cell on the grid and click Form> Grid> Add Exist Field Column from the ribbon.
- Right-click the grid heading row and click Add Column in Existing Field from the context menu.
- In the Add New Column dialog, select the field you want to add as a column from the Filelds choices and select the UI format for editing from the Form Element choices.
- Click the OK button in the dialog to add the selected field to the right edge of the grid column.
- To change the order of the grid columns, do one of the following:
- Select any cell in the column you want to move and click Form> Grid> Move Column Left, Move Column Right from the ribbon.
- Drag and drop the column headings in the grid to move the column positions.
- To remove a column from the grid and hide it, do one of the following:
- Select any cell in the column you want to delete and click Form> Grid> Delete Column from the ribbon.
- Right-click the column heading in the grid and click Delete from the context menu.
note
- To change the column structure of the grid, one or more related models must exist.
- If the related model is empty, add a temporary model and then change the column structure.
Change the default column width

Operation procedure
- Select any cell in the grid column for which you want to change the default column width.
- Drag and drop the border of the grid column heading to adjust the column width and click Form> Grid> Set Default Column Width from the ribbon.
- Click to save the column width in the view definition and display it with the default column width when you reopen the project.
- To temporarily change the column width and then return it to the default column width, select any cell in the grid column for which you want to return the column width, and then select Form> Grid> Reset Column from the ribbon. Click Width.
note
- The rightmost column of the grid expands and contracts according to the width of the editor view, so you cannot change the default column width.
Change the display format of related models
Change the display format of related models
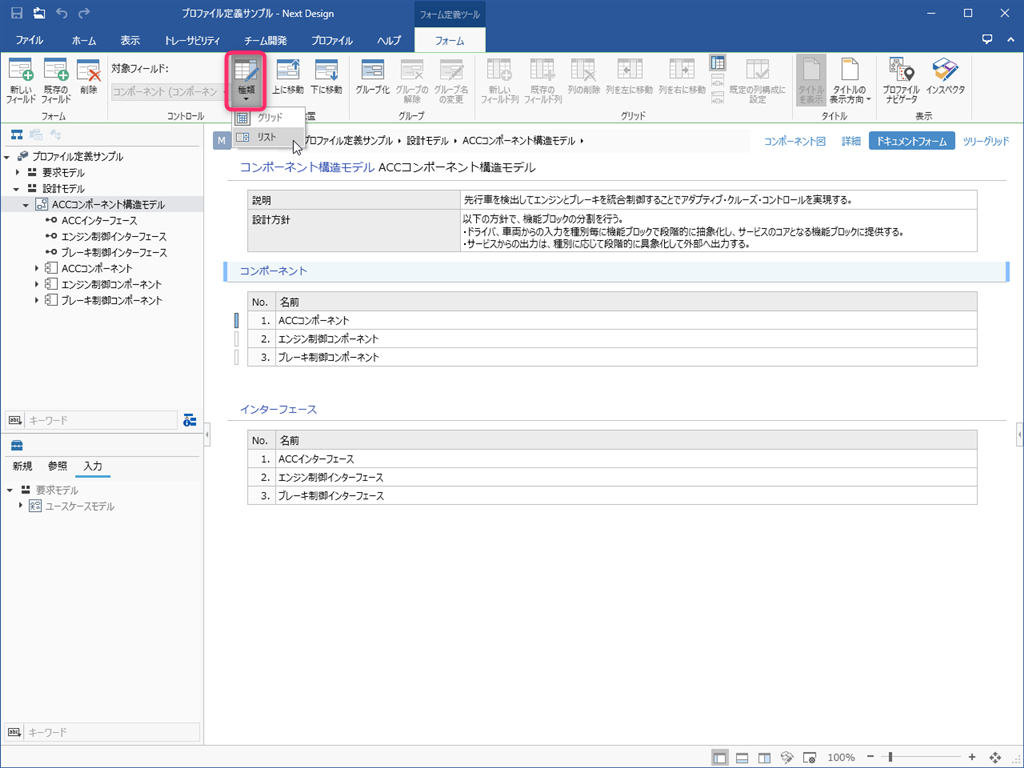
Operation procedure
- Click to select the related model for which you want to change the display format.
- Click Form> Control> Kind from the ribbon and select Grid or List.
Change the order of the fields
Change the order of the fields
Operation procedure
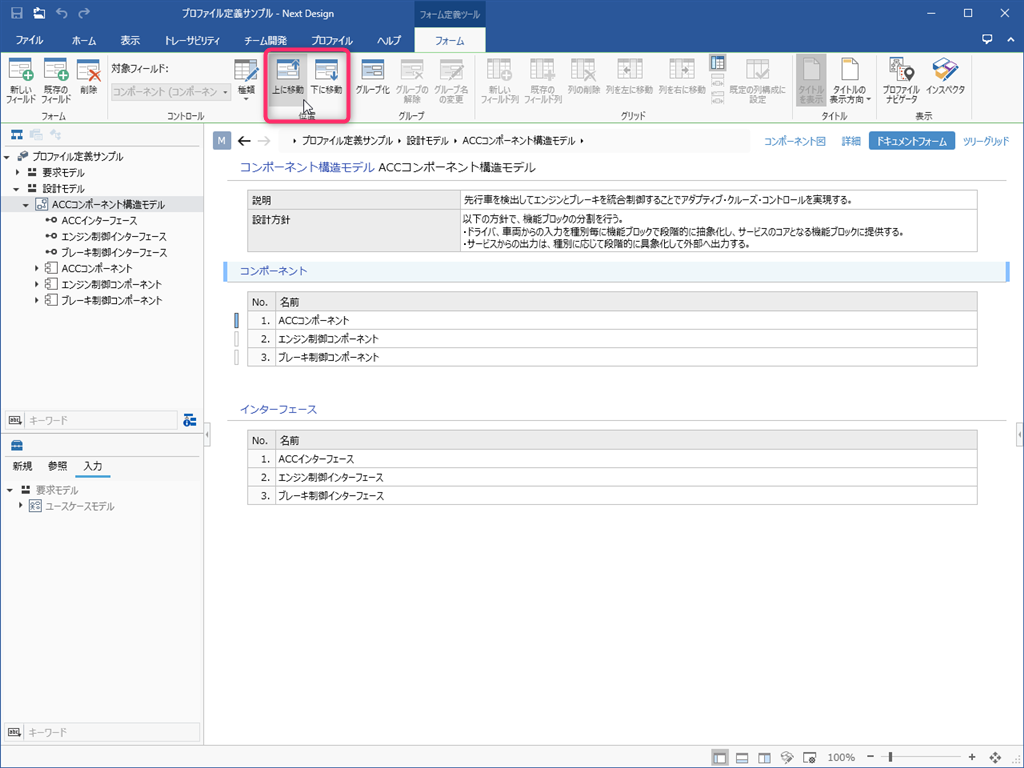
- Click to select the title of the field whose order you want to change.
- From the ribbon, click Form> Place> Move Up, Move Down to change the order.
note
- The order of related models displayed with serial numbers can be changed by selecting the model and dragging and dropping.
Hide the placed field
Hide placed fields
Operation procedure
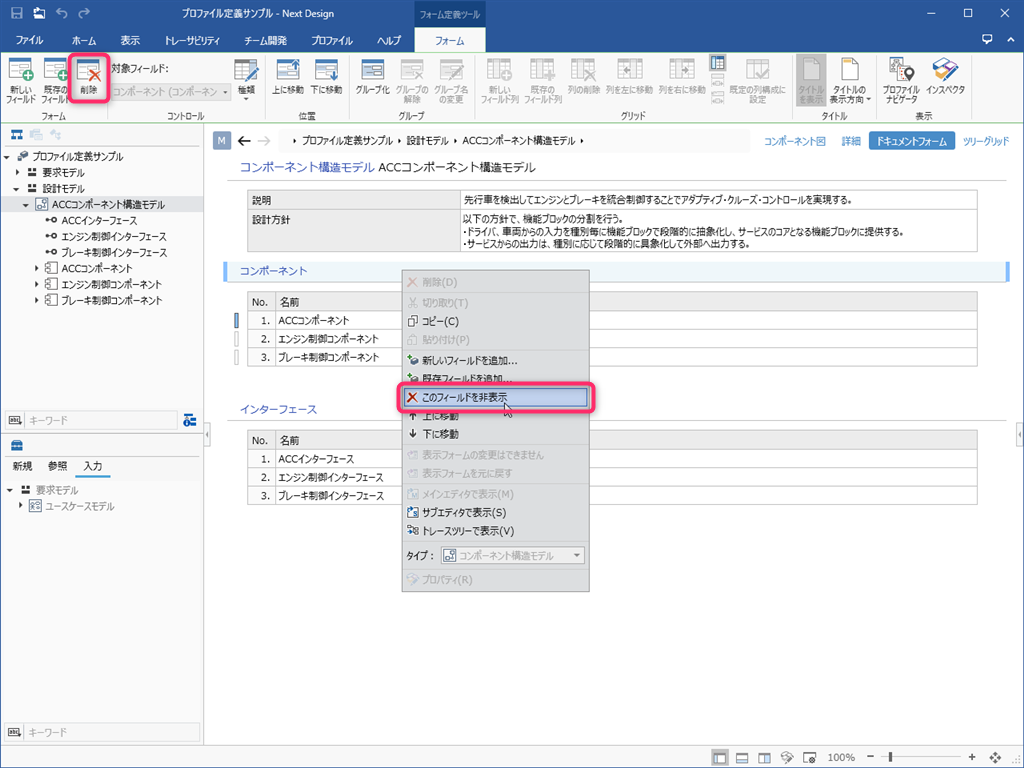
- Click to select a field located on the form.
- Do one of the following:
- Click Form> Form> Delete from the ribbon.
- Click Hide this Field from the context menu.
Group fields
Group fields
Operation procedure
- Hold down the ctrl key and click to select multiple fields you want to group.
- From the ribbon, click Form> Group> Grouping.
- In the Grouping dialog, enter the Display Name and Group Name and press the OK button.
- The group title is added to the form and the selected fields are lined up under the group. Click the left edge of the group title to collapse or expand each group.
note
- To group multiple fields, they must be adjacent.
- If they are not adjacent, reorder them so that they are adjacent, as described in "Reordering Fields" above.