Migrating extensions from V1.1 to V2.0
In Next Design V2.0, we made the following changes that affect the .NET DLL's extension execution mechanism:
- Changed the working framework of the application from .NET Framework 4.6.2 to .NET Core 3.1
- Changed the extension's Library Loading Mechanism
These changes require a migration to use extensions developed in V1.1 with V2.0.
info
- V1.1 extensions may work without migration, but please consider migrating to prepare for unintended behavior of extensions and future version upgrades.
Porting extensions to .NET Core
Many extensions are relatively easy to port from the .NET Framework to .NET Core. This section describes a library porting scenario using Visual Studio.
info
- V2.0 provides a command line tool that makes it easier to develop extensions.
- You can also use command line tools to replace the creation of the ported project described here.
- See NDExt for more information.
- Create a new project targeting .NET Core 3.1.
Create a .NET Core 3.1 project
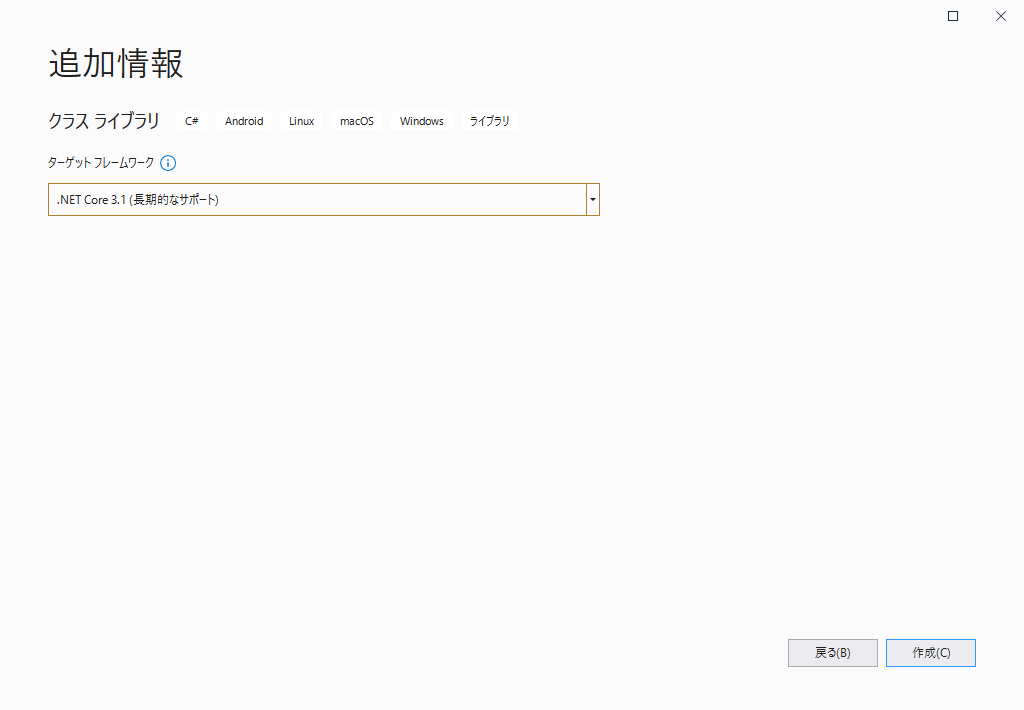
Target framework selection
- Select
.NET Core 3.1as the target framework in the additional information when creating the project.
- Use NuGet to add the following dependent packages to your project.
- NextDesign.Desktop
Add dependent packages with NuGet
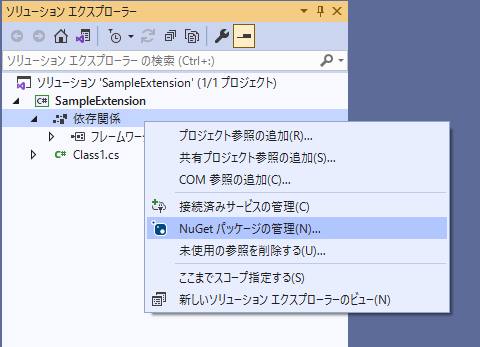
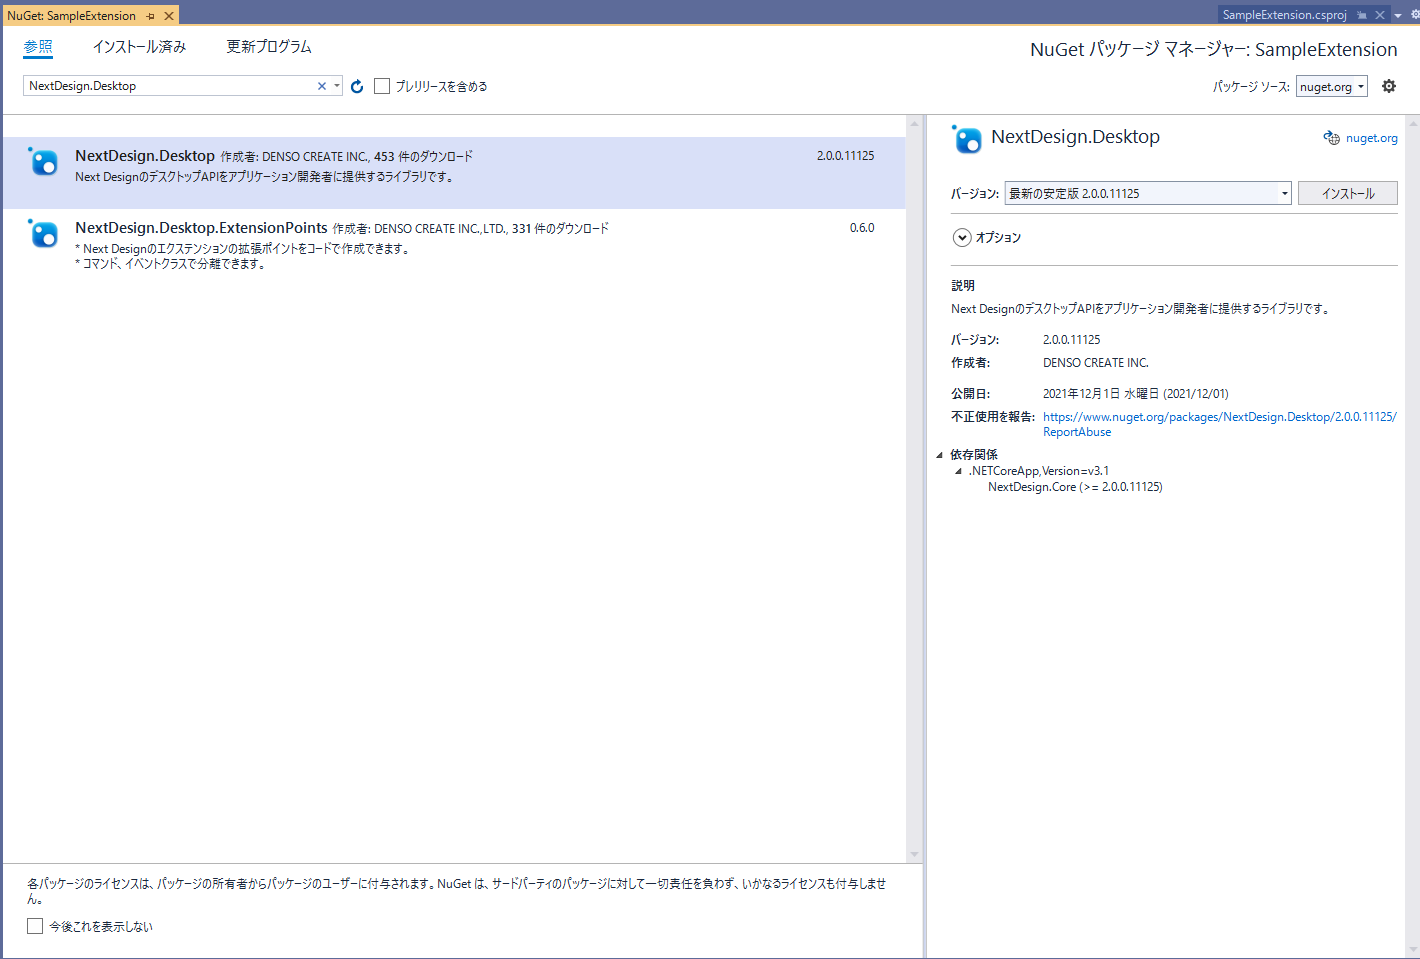
Operation procedure
- Launch NuGet Package Management from the project context menu.
- In the Browse tab, search for and select
NextDesign.Desktop. - Click the install button to start the installation.
tip
- The latest version of the current NextDesign.Desktop package is
2.0.0.11125
If the original extension has dependent libraries, add references to them.
- Adding a reference with the NuGet package
- If the dependent package does not support .NET Core 3.1, please upgrade to a version that supports .NET Core 3.1.
- In most cases, a version corresponding to .NET Core 3.1 is available.
- Adding a reference by library reference
- If the dependent library is not compatible with .NET Core 3.1, please obtain a new library compatible with .NET Core 3.1 from the library provider and update it.
- Adding a reference by project reference
- If the dependent project is not .NET Core 3.1 or .NET Standard 2.0, port (or migrate) the dependent project as well.
- Adding a reference with the NuGet package
Add the source code, manifest file, and resource file of the original extension to the created project.
- In the case of .NET Core project, if you place the file under the project folder, it will be added automatically.
- AssemblyInfo.cs file does not need to be migrated
- Set the properties of the manifest file and other resource files as needed, just like the original extension.
Set various information such as assembly version in the properties of the created project.
Specify assembly name and default namespace
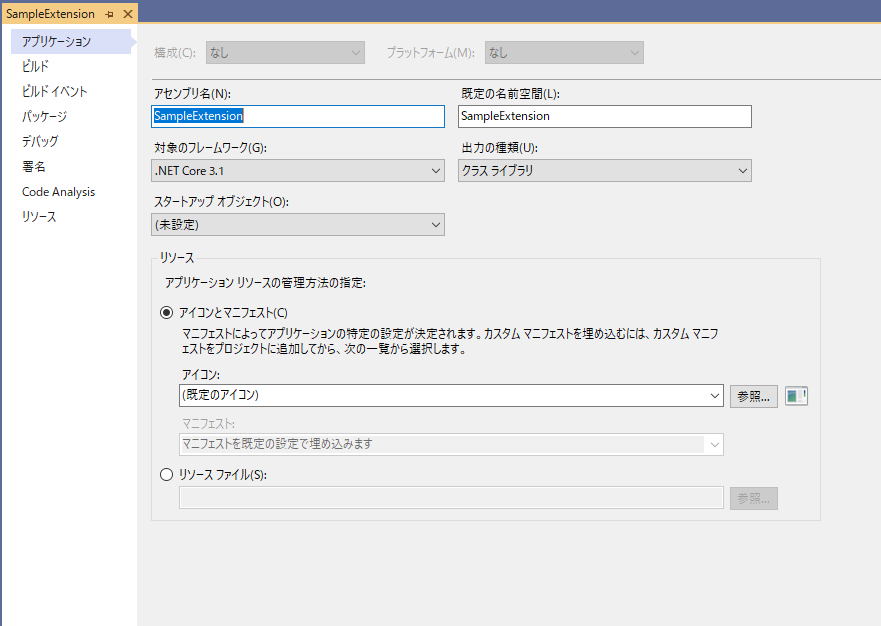
note
- Set in the same way as the original extension.
Specify version and creator
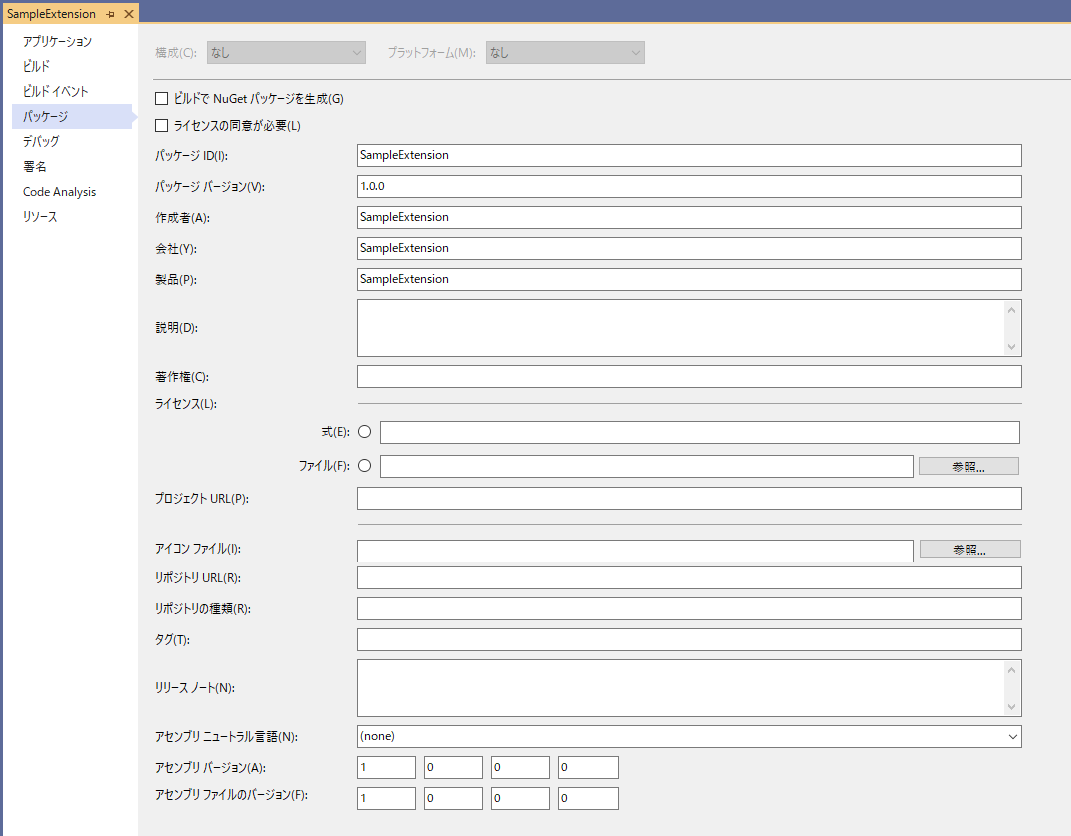
note
- Migrate the definition of AssemblyInfo.cs of the original extension
If the extension uses the following API modified in V2.0, fix the relevant part.
If the extension uses a function/API that is not available in the following V2.0, fix the relevant part.
- API deleted in V2.0
- API to be consolidated
- Information sharing between extensions by static variables
- In V2.0, information cannot be shared between extensions by static variables due to Change extension loading mechanism.
- If the extension to be migrated shares information between extensions using static variables, consider an alternative method.
If there is a part where the build does not pass due to the version upgrade of the dependent package, fix it.
tip
- If you are having trouble migrating from .NET Framework to .NET Core, the following pages will help.
Build and distribute V2 extensions
The .NET Core library project does not output the library referenced by NuGet at build time. Therefore, when you distribute an extension, you need to collect the extension's dependent libraries. This section describes how to collect dependent libraries.
info
- You can create extension distribution packages with command line tools.
- See NDExt for more information.
- Use the dotnet publish command to collect dependent libraries.
- When using Visual Studio, it is convenient to execute the command in the build event.
- Open the
build eventin the project properties. - Set the following command in the
command line of post-build events.dotnet publish --no-build
- $ {Build output folder}/publish folder will output dependent libraries and assembly metadata description files.
- Open the
- When using Visual Studio, it is convenient to execute the command in the build event.
tip
- Be sure to specify the "--no-build" option when executing the dotnet publish command in the post-build event.
- If you do not specify the "--no-build" option, the build process will loop infinitely.
- Run the project build.
tip
- Unless there is a special reason on the extension side, it is recommended to specify "Any CPU" as the build platform.
Delete the libraries under the $ {build output folder}/publish folder that are not needed for distribution.
- NextDesign.Core.dll
- NextDesign.Desktop.dll
- Symbol (.pdb) file
Distribute all the files in the publish folder.
- Be sure to include the assembly metadata description file (.deps.json).
- If you have a manifest or any other files you need, include them here.